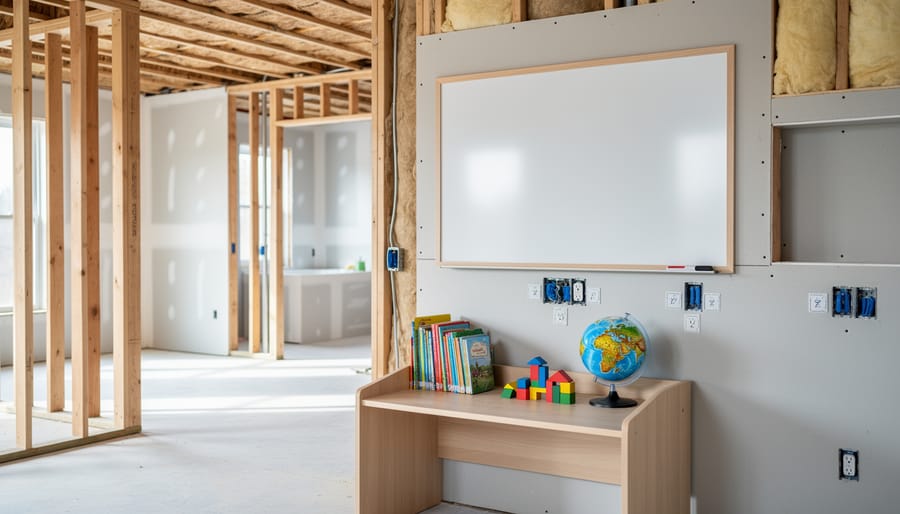
Planning a dedicated learning space during your whole-home renovation means integrating educational zones into your floor plan from day one, not squeezing them in after walls go up. This approach transforms homeschooling from a dining-table scramble into a purposeful part of your home’s design, and it starts with a conversation between you and your contractor before demolition begins.
I learned this lesson the hard way. When my husband and I renovated our first home, we thought we’d “figure out the school area later.” By the time drywall was up, we’d lost the perfect south-facing nook to an oversized pantry we rarely use. That mistake taught me something valuable: homeschooling families need to advocate for learning space with the same clarity we’d bring to kitchen layout or bedroom count.
The process isn’t complicated, but it does require you to think differently about square footage. Most renovation professionals design around cooking, sleeping, and entertaining. They won’t automatically carve out a quiet reading corner, plan storage for three years’ worth of manipulatives, or consider sightlines that let you supervise a kindergartener while helping a middle-schooler. That’s your job, and you’re uniquely qualified for it because you know exactly how your children learn.
The good news? Contractors love clear direction. When you walk into your first planning meeting with a list of non-negotiables (a sink near the art zone, electrical outlets every four feet for multiple workstations, built-in shelving that grows with your curriculum), you’re speaking their language. The challenge is getting those details on paper early enough to matter.
When you’re renovating a family home in Kitchener you have a rare opportunity to build learning into the bones of your house, but only if you plan for it before the first permit gets pulled.
Why Your Renovation Is the Perfect Time to Create a Learning Hub
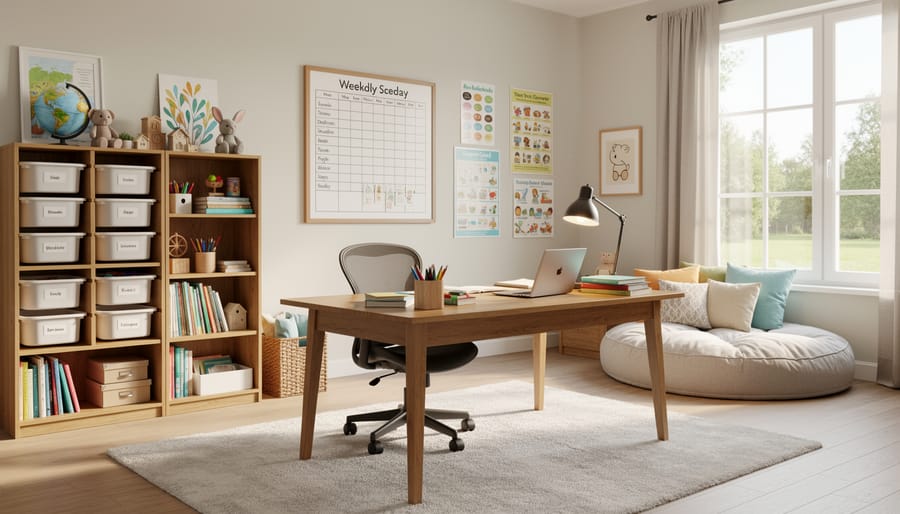
When you’re already tearing down walls and redesigning your home’s flow, adding a thoughtful learning space costs a fraction of what it would to retrofit later. I learned this firsthand when we renovated our Kitchener home years ago. We had originally planned to “figure out the homeschool space later,” but our architect convinced us to plan it from the start. That decision saved us thousands and gave us structural options that simply wouldn’t exist now without another major renovation.
The cost advantage alone makes this timing ideal. Running electrical for a learning station costs pennies per outlet when the walls are already open. Adding built-in storage during framing is straightforward carpentry work. But try doing those same upgrades in a finished room three years later, and you’re looking at demolition, dust, and bills that make you wince. Your contractor is already ordering materials, coordinating trades, and managing the workflow. Folding learning space requirements into that existing project leverages economies of scale you’ll never see again.
Beyond dollars, renovations unlock structural possibilities that don’t exist once drywall goes up. Want to add a window for natural light in what’s currently a dark interior room? Easy during a gut renovation, nearly impossible later. Need to relocate a doorway so the learning space connects directly to the kitchen where you work? Your framing crew can handle that now. Considering a half-wall to maintain sightlines while defining the learning zone? These aren’t minor cosmetic changes. They’re fundamental design choices that shape how your family learns and connects daily.
Many of us came to homeschooling because traditional school wasn’t meeting our children’s needs. The rigid schedules, the one-size-fits-all approach, the lack of flexibility for different learning styles. Your renovation gives you the chance to build something better from the ground up. You can design for movement and hands-on learning. You can create quiet focus zones and collaborative spaces. You can plan storage that actually holds the manipulatives, art supplies, and science materials your curriculum requires.
This is your opportunity to design for the long game. Your six-year-old will be twelve before you know it. That cozy reading corner needs to accommodate a teenager someday. The art table should work for chemistry experiments later. Planning now means your space grows with your children instead of becoming obsolete.
What You’ll Need Before Breaking Ground
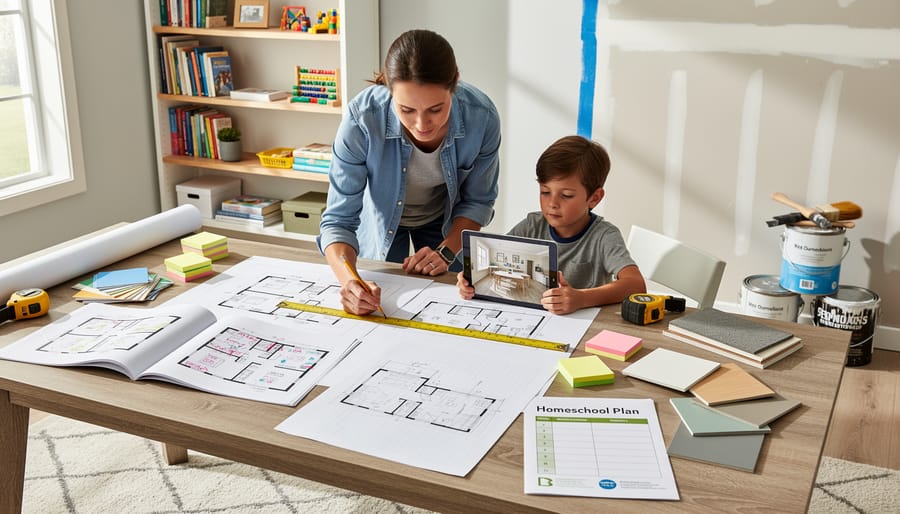
Before you schedule that first contractor meeting, gathering the right planning tools makes the difference between a learning space that truly works and one that feels like a compromise. I learned this the hard way during our own renovation. I walked into early meetings with vague ideas about “a room where the kids can learn,” and my contractor just nodded politely while having no real picture of what we needed. Once I showed up with measurements, sketches, and specific requirements, everything clicked into place.
Your planning toolkit needs both tangible items and thoughtful preparation. Start with a family learning needs inventory. Sit down and honestly assess how your children actually learn, not how you wish they learned. Do they spread materials everywhere? Do they need quiet corners or thrive with background activity? How many kids need simultaneous workspace? This honest assessment drives every other decision. If you’re new to homeschool planning this inventory becomes even more valuable because you’re designing a space that can adapt as you discover your rhythm.
Your essential planning toolkit includes:
- Family learning needs inventory documenting each child’s learning style, space requirements, and materials
- Measurement tools and accurate floor plan dimensions of potential learning areas
- Design inspiration boards showing storage solutions, lighting, and layout ideas you love
- Budget spreadsheet separating must-haves from nice-to-haves for the learning space
- Contractor brief template explaining homeschool-specific needs in renovation terms
- Sample layouts sketched for different learning scenarios your family might use
The budget spreadsheet deserves special attention. Renovation costs spiral quickly, and learning space features often get cut when money gets tight. Separate your essentials (adequate electrical outlets, proper lighting, core storage) from upgrades (custom built-ins, specialty flooring). This clarity helps you advocate for what truly matters when your contractor suggests changes.
Finally, create a simple contractor communication plan. Most renovation professionals understand playrooms and home offices, but homeschool spaces occupy a unique middle ground. Your plan should include photos of your current setup, measurements of your largest learning materials, and examples of daily activities that need accommodation. When I showed our contractor pictures of our science experiments and math manipulative storage, he immediately understood why we needed deeper shelving and water-resistant surfaces. That visual communication saved countless back-and-forth conversations and prevented costly mid-construction changes.
Important Considerations Before You Start
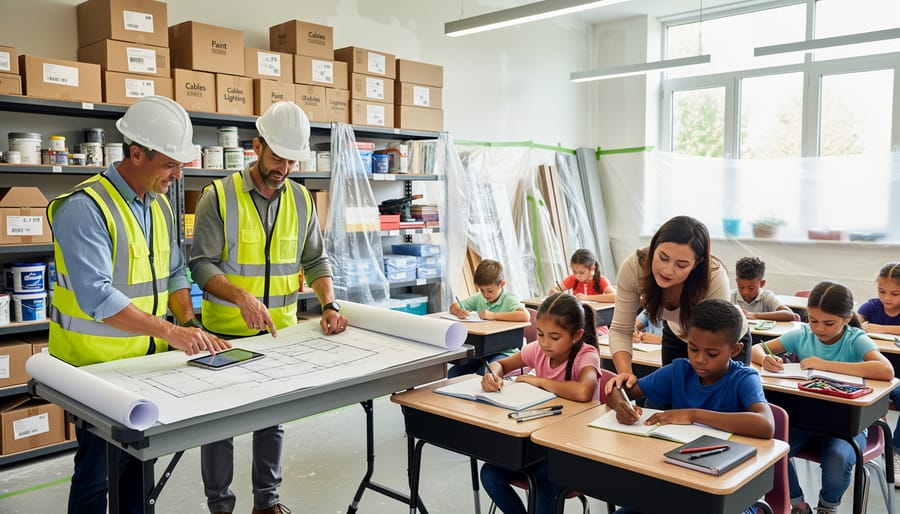
Before you start sketching floor plans and choosing paint colors, pause. A few critical missteps at this stage can turn your dream learning space into a costly mistake or daily frustration.
The biggest trap I see homeschooling families fall into is over-customization. Yes, your eight-year-old loves dinosaurs and learns best surrounded by fossils and dig-pit tables, but will that built-in paleontology nook serve your family in three years? Design for flexibility first. Avoid permanent fixtures tied to a single subject, age, or interest. A well-lit room with adaptable storage will serve you far longer than a space designed around this year’s curriculum theme.
Budget pitfalls sneak up quickly when you’re already managing a whole-home renovation. Learning spaces tend to expand in scope once you start planning. That simple reading corner becomes a full maker space with specialized electrical, and suddenly you’ve blown through your contingency fund. Set a firm budget for the learning area portion of your renovation and protect it. Remember, you can always add later, but removing custom built-ins you can’t afford is painful.
In Kitchener, zoning and permits matter more than you might think. If you’re finishing a basement or converting a garage into learning space, you need proper permits. Don’t let a contractor talk you into skipping this step. Unpermitted work can haunt you at resale and may not meet safety codes for spaces where children spend significant time.
Living through construction with kids at home is genuinely challenging. Noise, dust, disrupted routines, and loss of access to parts of your house will affect your homeschool day. Plan for this reality. You might need to reduce your academic expectations during construction months, arrange temporary learning locations, or delay the project until summer break.
Finally, resist the urge to sacrifice all your family gathering spaces for dedicated learning areas. Your kitchen table, living room floor, and backyard aren’t wasted learning real estate, they’re where some of the best learning happens. A separate learning room should enhance your homeschool, not isolate it from family life.
Step-by-Step: Planning Your Learning Space Within the Renovation
Step 1: Assess Your Family’s Learning Needs and Style
Start by sitting down with a cup of coffee and really thinking about your kids, not some generic homeschooler’s kids, but yours. How many children will use this space? Right now you might have a seven-year-old and a four-year-old, but in five years you’ll have a tween and an elementary student with completely different needs.
Consider how each child learns best. Does your daughter need to move while she thinks, building with blocks during math? That’s kinesthetic learning, and she’ll need floor space and storage for manipulatives. Does your son remember everything he sees but struggle with audio-only lessons? Visual learners need wall space for charts, timelines, and displays. One of mine could listen to audiobooks all day, while another needed everything written down, knowing this shaped our space requirements dramatically.
Think about which subjects need dedicated real estate. Science experiments require counter space and access to water. Art projects need surfaces you won’t worry about. Math manipulatives multiply faster than you’d think possible, and they need organized homes or they’ll migrate throughout your entire house.
Project forward honestly. That kindergartener will be doing high school chemistry someday. The renovation happening now needs to accommodate microscopes, dissection trays, and possibly multiple children working on different grade levels simultaneously. You’re the expert on your family’s trajectory, trust that knowledge as you plan.
Step 2: Choose the Right Location in Your Floor Plan
Location isn’t just about where you have available space, it’s about where learning will actually happen in your daily rhythm.
Start by observing your current homeschool flow. Do your kids gravitate toward working near you while you tackle household tasks? A kitchen-adjacent nook or dining room conversion might serve you better than a separate classroom upstairs. I learned this the hard way when we initially planned a beautiful dedicated room far from the kitchen, only to find my youngest constantly migrating to the table where I could answer questions between making lunch.
For Kitchener homes, natural light makes an enormous difference during our grey winter months. If possible, claim a space with south or east-facing windows. Your renovation is the perfect time to discuss adding skylights or enlarging windows in basement spaces, changes that are cost-prohibitive later.
Consider these common options:
Dedicated spare bedroom: Offers quiet and boundaries, ideal for older independent learners or families who need to separate learning from living spaces.
Kitchen-adjacent area: Keeps younger children supervised while you work, reduces isolation, and naturally integrates learning into family life.
Finished basement: Provides generous square footage and potential for messy projects, though you’ll need to address lighting and ensure comfortable temperatures year-round.
Bonus room or loft: Offers semi-separation without complete isolation, works well for mixed-age families.
Think about noise too. Placing the learning space directly under the master bedroom might complicate naptime for younger siblings, while a basement location provides built-in sound buffering for enthusiastic science experiments.
Step 3: Communicate Your Vision to Your Renovation Team
Most renovation professionals have designed playrooms, home offices, and craft spaces, but they’ve rarely planned for homeschooling. Your job isn’t to become an expert in construction; it’s to translate your children’s daily learning reality into terms your team can work with.
Start by sharing the basics. Explain that this space will be used 5-6 hours daily, five days a week, by multiple children at different ages and stages. That immediately helps contractors understand wear-and-tear expectations. I’ve found it helpful to say, “We need this to function like a working classroom, not a hobby room used occasionally.”
Be specific about the practical details. Instead of saying “we need good storage,” try “we store 40-50 workbooks, three sets of math manipulatives, art supplies for messy projects, and science materials that need to stay accessible.” That gives your designer actual volumes to plan for.
For electrical needs, describe a typical learning morning: “Three kids might simultaneously use a computer, tablet, and charging phone, plus we run a laminator and occasionally need power for experiments or presentations.” That’s clearer than requesting “lots of outlets.”
Don’t assume they’ll guess about sound. Explain that reading aloud happens daily, sometimes overlapping with independent work that requires concentration.
Step 4: Design for Storage and Organization
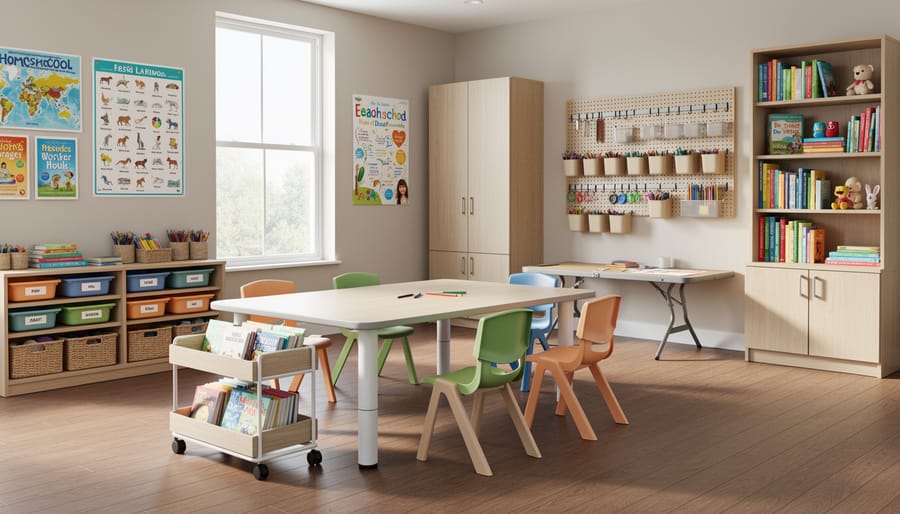
Storage will make or break your learning space, and renovation time is when you get it right from the ground up.
Start by calculating volume, not just square footage. Homeschool families accumulate curriculum, manipulatives, art supplies, science materials, and projects-in-progress at astonishing rates. Ask your contractor for floor-to-ceiling built-ins where possible, they cost only marginally more during construction than standard-height cabinets, but double your storage capacity. In Kitchener homes with basement learning spaces, consider the structural advantage: you can install heavier shelving systems that won’t work in upper-floor retrofits.
Design low, accessible storage your children can reach without help. Open cubbies at kid height for daily-use items (workbooks, pencil cases, current read-alouds) teach independence and cut down on the “Mom, where’s my…” interruptions. Reserve upper shelving for teacher materials, future curriculum, and items you’re rotating out seasonally.
Build in flexibility by specifying adjustable shelving tracks rather than fixed shelves. Your kindergartener’s bin of pattern blocks becomes your middle-schooler’s chemistry kit storage. One family I know planned their built-ins with a mix of closed cabinets (hiding visual clutter) and open shelves (displaying beautiful books and nature finds), it balanced function and calm beautifully.
Don’t forget a dedicated “in progress” zone. Whether it’s a wide windowsill for seedling experiments or pull-out drawers for half-finished Lego builds, having a place where work stays untouched between sessions prevents daily setup-and-cleanup battles. When you set up a homeschool room these organizational bones will support whatever teaching approach you choose, year after year.
Step 5: Plan the Technical Infrastructure
Modern homeschooling relies heavily on technology, so this step makes or breaks your learning space’s functionality. Start with electrical planning: you need far more outlets than a typical room. Ask your electrician for at least two outlets per child workspace, plus extras for shared equipment like printers, laminators, or charging stations. Position outlets 18 inches above desk height so kids aren’t crawling under furniture to plug things in.
Lighting deserves serious attention. Natural light is ideal, but Kitchener winters mean you’ll depend on artificial lighting too. Request daylight-spectrum LED fixtures on dimmers, harsh overhead lights cause headaches and eye strain during long reading sessions. Add task lighting at each workspace for close work.
Internet connectivity is non-negotiable. Hard-wire ethernet ports if possible, especially if multiple children stream educational videos simultaneously. WiFi works, but a dedicated access point in the learning space prevents connectivity battles.
Climate control often gets overlooked. Learning spaces see more occupancy than bedrooms, generating heat from bodies and electronics. Ensure your HVAC plan accounts for this or add a dedicated mini-split unit. Consider acoustic treatments like area rugs or fabric wall panels if the space will echo, constant noise fatigue wears everyone down.
Step 6: Review Plans and Make Adjustments
You’ve received the plans, now’s the time to catch anything that won’t work before a single wall goes up. Schedule a dedicated review session with your partner when you can spread out the drawings and walk through them mentally as if you’re already homeschooling in that space.
Look for the practical details that architects might miss: Can you see all the children from the main workspace? Are outlets positioned where laptops and tablets will actually sit, not just code-minimum spacing? Is the storage volume genuinely enough for your current curriculum plus growth? Will morning light hit the desks, or will you be battling glare during prime learning hours?
Don’t hesitate to ask questions that feel basic. “Where exactly will the bookshelf go?” isn’t nitpicking, it’s protecting your investment. If something feels off, speak up now. Modifications on paper cost nothing compared to changes mid-construction.
I’ve seen parents stay quiet about a storage concern because they didn’t want to seem difficult, then spend years working around an inadequate closet. Your contractor wants to get it right the first time. Be specific about what you need changed and why it matters for your homeschool, and most will work with you to find solutions.
Verifying Your Learning Space Meets Your Needs
The best time to verify your learning space is actually twice: once when reviewing the final plans before construction begins, and again during the walk-through before you sign off on the renovation. That second check is critical because what looks perfect on paper doesn’t always translate to real life with real kids and real curriculum materials.
I learned this the hard way when a built-in desk that seemed generous in the floor plan turned out to be just slightly too narrow for my daughter’s art projects and my son’s science notebooks side-by-side. Catching issues early, while contractors are still on-site, saves you from expensive fixes later or worse, living with a space that doesn’t quite work.
Walk through your planned or completed learning space with this verification checklist, testing each element physically rather than just eyeballing it:
- Workspace adequacy: Have each child sit at their designated spot with their actual materials spread out. Can they work comfortably without encroaching on a sibling’s area? Is there room for an open textbook, notebook, and laptop simultaneously?
- Storage capacity test: Gather your current homeschool materials and physically place them in the planned storage. Add 30% more space than you think you need because curriculum accumulates faster than you expect.
- Lighting levels: Check natural light at different times of day, especially morning hours when you’ll likely do focused work. Turn on artificial lighting and confirm there are no glare spots on work surfaces or screens.
- Tech connectivity: Test internet speed in the space with multiple devices connected. Verify there are enough outlets within reach, not across the room requiring extension cords.
- Movement space: Clear the furniture and have your kids actually move around. Can they spread out a floor puzzle? Do a science experiment? Access storage without squeezing past someone working?
- Distraction assessment: Sit in the space for 20 minutes. What do you hear from other parts of the house? What pulls your eye away from the work area? Sometimes a window view that seemed lovely creates constant distraction.
- Future flexibility: Imagine your youngest child five years older and your oldest potentially moved on. Can furniture be reconfigured? Will the space serve a teenager’s independent study needs?
If something isn’t working during construction, speak up immediately. Contractors can adjust before drywall goes up much more easily than after. I’ve found most renovation teams appreciate specific, practical feedback like “we need the desk six inches deeper” rather than vague concerns.
After move-in, give yourself a month of actual homeschooling before making permanent changes. Some issues resolve as you settle into new routines, while others become more apparent with daily use. Simple fixes like adding a dimmer switch, relocating a bookshelf, or hanging curtains for visual separation can make a surprising difference without calling contractors back.
Common Questions About Renovation-Integrated Learning Spaces
Common Questions About Renovation-Integrated Learning Spaces
Planning a learning space during your renovation raises questions you won’t find answered in standard home improvement guides. Here are the concerns homeschooling parents in Kitchener ask most often.
How much of my renovation budget should I allocate to the learning space?
Plan for 10-15% of your total renovation budget if you’re creating a dedicated room, or 5-8% if you’re integrating learning features into existing spaces. This covers built-in storage, proper lighting, tech infrastructure, and durable surfaces that will withstand years of daily use.
Should I tell my contractor we homeschool?
Absolutely. Your renovation team can’t design for needs they don’t understand. Explaining that the space will be used for daily education helps them suggest practical solutions you might not have considered, from outlet placement to soundproofing options.
How do I plan one space for children at different ages and stages?
Design for flexibility rather than age-specific features. Adjustable shelving, modular furniture zones, and generous floor space work for a kindergartener today and a teenager in five years. Avoid built-ins sized for small children that will need replacing as they grow.
Can we continue homeschooling during the renovation?
Yes, though you’ll need a temporary learning setup. Many Kitchener families designate one untouched room as a learning refuge, use their local library’s study spaces, or adjust their schedule to learn during quieter construction hours. Planning this transition before demolition starts prevents last-minute scrambling.
Will a dedicated homeschool space hurt our home’s resale value?
Not if you design it with flexibility in mind. A well-lit room with ample storage appeals to future buyers as a home office, craft room, or study regardless of whether they homeschool. Avoid overly specialized features like classroom-style desks bolted to the floor.
Do I need special permits in Kitchener for a learning space?
You don’t need education-specific permits, but standard building permits apply if you’re adding square footage, moving walls, or significantly altering electrical or plumbing. Your contractor will handle permit applications, but mention the room’s intended use so they can ensure adequate electrical capacity for multiple devices and proper ventilation if you’ll be doing messy projects.
Budget anxiety often stems from comparing your learning space to expensive classroom buildouts, but home learning spaces don’t need commercial-grade everything. Focus your spending on elements that directly support daily use: lighting that reduces eye strain, storage that keeps materials accessible, and surfaces that survive spills and experiments. The fancy interactive whiteboard can wait until after you’ve moved back in and seen how the space actually functions.
Timeline questions usually center on whether to tackle the learning space first or last in a phased renovation. I’ve seen both approaches work. Creating the learning space early gives kids stability during the chaos, but finishing it last means you can incorporate lessons learned from the rest of the project. If you’re doing the work all at once, request that the learning area be completed in the first half so you can test it while contractors are still on-site for easy adjustments.
You’ve done the hard work of planning a learning space that will serve your family for years to come. While the renovation process might feel overwhelming right now, remember that you’re creating more than just a room. You’re building a foundation for curiosity, discovery, and those magical learning moments that happen when children have space to explore.
Trust yourself in this process. You know your children better than any architect, designer, or contractor ever will. You understand which child needs a quiet corner to concentrate, who thrives with movement and hands-on materials, and how your family’s rhythms flow throughout the day. That knowledge guided your planning, and it’s what will make this space truly work for your homeschool.
The investment you’re making now, in both time and resources, will pay dividends every single day. Instead of constantly rearranging furniture or fighting clutter in spaces that were never meant for learning, you’ll have a purposeful environment that supports your educational goals. Your children will have room to spread out their projects, access materials independently, and develop ownership of their learning space.
Once construction wraps up, you’ll face the exciting work of setting up your new space and establishing routines that make it hum. Take your time with that process, involve your children, and adjust as you go. The learning space you’ve planned will grow and evolve with your family, adapting to new interests, curriculum changes, and the inevitable shifts that come with growing children.