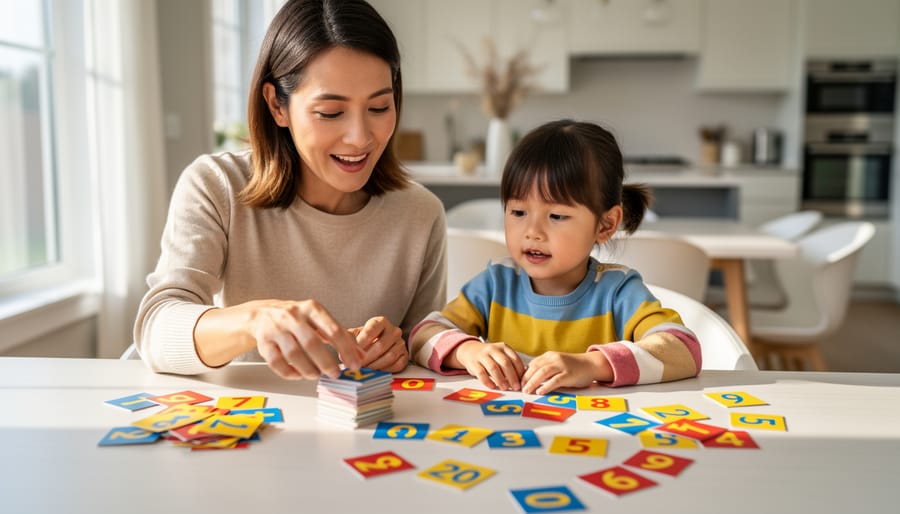
Direct instruction is a systematic teaching method where you break down complex skills into bite-sized steps, model exactly what you want your child to learn, guide them through practice with immediate feedback, and only move forward once they’ve mastered each piece. If you’re feeling overwhelmed by vague curriculum guides or wondering why your child isn’t retaining what you’re teaching, this structured approach gives you a clear roadmap: you teach one concept explicitly, check for understanding, and build from there.
I discovered the power of this method during my first chaotic year of homeschooling, when my daughter struggled through a math lesson because I’d assumed she understood place value. Once I stopped, backed up, and showed her step-by-step how to line up numbers (talking through my thinking out loud as I demonstrated), suddenly everything clicked. That’s direct instruction in action. It’s not about drilling facts mindlessly or removing all creativity from learning. It’s about giving your child the scaffolding they need to succeed before asking them to work independently.
This evidence-based strategy is particularly effective for students who need extra support, making it invaluable when you start homeschooling and realize your child learns differently than their peers. The beauty of direct instruction lies in its transparency. You’re not leaving your child to figure things out through trial and error. You’re showing them the path, walking it together, then watching them take confident steps on their own. Whether you’re teaching phonics, fractions, or essay writing, the framework remains the same: clarity, practice, and mastery before moving on.
What You’ll Need to Get Started with Direct Instruction
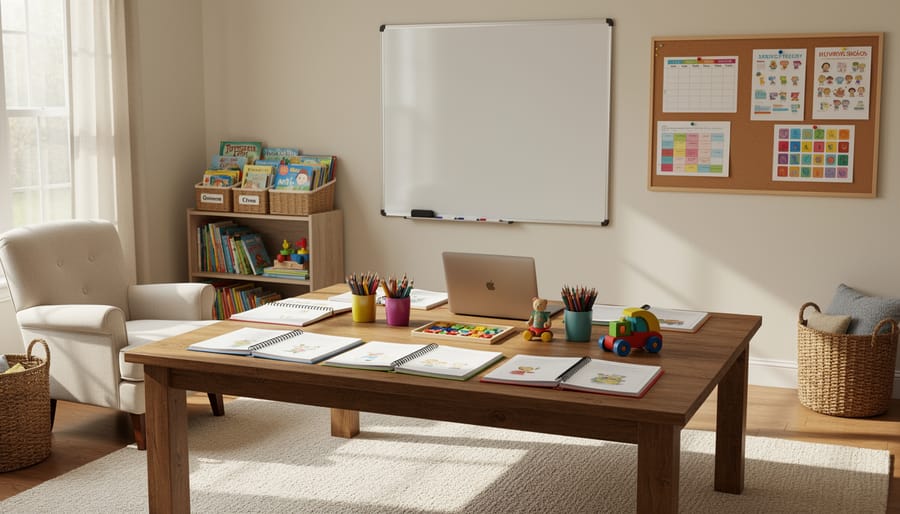
Good news: you probably already have most of what you need to start using direct instruction in your homeschool. This isn’t about fancy materials or expensive programs, it’s about having the right mindset and a few basic tools that help you teach clearly and intentionally.
First, you need curriculum or lesson content that can be broken into smaller, teachable steps. This might be a math textbook, a phonics program, or even a YouTube tutorial on writing persuasive essays. The key is choosing material you can chunk into bite-sized pieces rather than overwhelming your child with everything at once. When you’re doing your homeschool planning think about how you’ll sequence these steps logically, building from simple to complex.
Here’s what else supports effective direct instruction:
- A quiet teaching space where your child can focus without distractions during lessons
- A planning notebook or digital doc for mapping out how you’ll break complex skills into manageable steps
- Visual aids or manipulatives that help you model concepts clearly (think number lines, letter tiles, diagrams)
- A timer to keep lessons focused and appropriately paced for your child’s attention span
- Simple assessment tools like quick quizzes, observation checklists, or “show me what you know” activities
The most important preparation happens in your head. You need to be ready to think through exactly what you’re teaching and why each step matters. Explicit instruction is evidence-based precisely because it requires this kind of intentional clarity, you’re not winging it or hoping your child figures things out independently.
Don’t overthink this. If you can explain a concept clearly, break it into steps, and check whether your child understands before moving forward, you’re ready to start.
When Direct Instruction Works Best (and When to Pause)
Direct instruction works brilliantly when you’re teaching foundational skills that need precision, think math facts, phonics rules, decoding strategies, and explicit vocabulary. These subjects benefit from the clear, step-by-step modeling that defines this approach. When your child needs to master a specific skill before building on it, direct instruction gives you a proven framework that reduces guesswork and builds competence systematically.
That said, this strategy isn’t meant for every moment of your homeschool day. Watch for signs your child is hitting cognitive overload: fidgeting, glazed eyes, sudden resistance, or answers that show they’re guessing rather than understanding. These are your cues to pause, not push harder.
Direct instruction excels during focused teaching time for challenging concepts, but it shouldn’t dominate your entire day. Creative subjects, exploratory science projects, and open-ended discussions thrive with less structure. If you’re using this approach for hours on end or applying it to every single subject, you’ll avoid common mistakes by scaling back. Think of direct instruction as your power tool for specific jobs, not the only tool in your homeschool toolkit. When your child masters a skill and can explain it back to you confidently, that’s your signal to move toward more independence and less explicit guidance.
The Six Steps of Direct Instruction Teaching
Step 1: Set a Clear Learning Intention
Before you pick up a textbook or worksheet, you need to name your target. A clear learning intention answers one simple question: what exactly will my child be able to do by the end of this lesson? This isn’t about covering a topic, it’s about pinpointing a specific, observable skill.
Weak learning intentions sound vague: “We’re going to work on fractions today” or “Let’s learn about photosynthesis.” Your child won’t know what success looks like. Strong intentions get precise: “By the end of this lesson, you’ll be able to add two fractions with different denominators” or “You’ll explain the three steps of photosynthesis in your own words.” Notice the difference? One describes an activity; the other defines a measurable outcome.
Once you’ve identified your intention, share it in kid-friendly language at the very start. I say something like, “Today you’re going to learn how to multiply a two-digit number by a one-digit number, and you’ll be able to solve problems like 23 × 4 on your own.” This focus, one of the explicit instruction key components keeps both of you on track and lets your child recognize when they’ve actually learned it.
Step 2: Teach and Model Explicitly

This is where the magic happens. You are becoming the teacher, showing your child exactly how to do something while letting them peek inside your brain.
Think-alouds are your secret weapon here. Instead of just solving a problem silently, you narrate your thought process out loud. When I taught my daughter long division for the first time, I didn’t just work through the steps. I said things like, “Okay, seven doesn’t go into four, so I need to look at the first two digits, forty-two. Now I’m asking myself, how many times does seven fit into forty-two? Let me think… seven times six is forty-two, so six times.” Every decision, every mental step, spoken aloud.
Break the skill into the smallest possible chunks. If you are teaching paragraph writing, don’t tackle the whole thing at once. Model just the topic sentence first. Show them one piece, do it yourself while they watch, then move to the next small piece.
This approach reduces cognitive load, which is just a fancy way of saying you are not overwhelming your child’s working memory. When you demonstrate clearly and break things down, their brain can actually absorb what you are teaching instead of drowning in too much information at once.
Your job in this step is to be crystal clear. Show, explain, think aloud, and keep each demonstration focused on one manageable piece of the larger skill. You are the expert, and they are learning by watching you work.
Step 3: Guide Your Child Through Practice
Now comes the fun part, watching your child try the skill with you right beside them, ready to help. Guided practice is where the magic happens because they’re doing the work, but you’re still there to catch mistakes before they become habits.
Start with a problem or task just like the one you modeled. Your child leads, but you stay actively involved. If they hesitate or make an error, pause and guide them back on track immediately, don’t wait until the end to correct everything at once. You might say, “Hold on, let’s look at that step again. What did we do first when I showed you?” This keeps them from practicing mistakes.
Think of it as practicing with training wheels still on. You’re reducing the support gradually, not all at once. For some kids, this means working through three examples together before they try one solo. For others, you might only need to guide the first example before they’re ready to fly.
I’ve found that asking “What comes next?” instead of telling them keeps their brain engaged. They’re actively thinking through the process, not just copying your moves. If they get stuck, offer just enough help to get them unstuck, maybe a hint or a reminder of your earlier demonstration, then let them continue.
The goal here isn’t speed; it’s building confidence and accuracy together.
Step 4: Check Understanding Frequently
This step matters because assumptions can derail everything, you need to know if your child truly understands what you just taught before layering on more complexity. Checking for understanding isn’t a final quiz; it’s a quick diagnostic during the lesson that tells you whether to proceed or reteach.
Ask your child to explain the concept back to you in their own words. Not parroting your exact phrasing, they need to rephrase it, which forces them to process the information. For math, have them show their work on a new problem while talking through each step aloud. If they stumble or skip steps, you know exactly where the gap is.
Another quick check: have them teach the skill to a younger sibling, stuffed animal, or even you. Teaching reveals understanding instantly. You can also pose a deliberately wrong example and ask them to spot the mistake, which tests whether they grasp the underlying rule.
For reading or writing lessons, integrate these checks into your literacy planning by asking questions like “What does this word mean in this sentence?” or “Why did we use a comma here?” These thirty-second check-ins save hours of frustration later when you realize they’ve been practicing incorrectly. If answers are shaky, loop back and re-model before moving forward.
Step 5: Provide Scaffolded Support and Feedback
Scaffolding simply means giving your child the exact help they need right now, then gradually dialing it back as they grow more confident. Think of it like teaching a child to ride a bike: you hold the seat firmly at first, then with one hand, then just a finger, then you let go completely. You’re not doing the riding for them; you’re scaffolds then fade support at just the right pace.
In practice, this might look like writing the first sentence of a paragraph together while your child writes the next one alone, or providing a partially completed math problem where they fill in missing steps. You might offer a word bank for spelling practice one day, then remove it the next week. The key is noticing when your child no longer needs a particular support, maybe they’ve stopped glancing at the multiplication chart or can start essays without your prompting questions, and quietly removing it.
Your feedback during this phase should be immediate and specific. Instead of “good job,” try “you remembered to carry the one this time, that’s exactly right.” When they stumble, point directly to where the thinking went sideways and guide them back without taking over.
Step 6: Ensure Mastery Before Moving On

Here’s when you know your child has actually mastered a skill: they can demonstrate it correctly multiple times across several days, not just ace it once on Tuesday and forget it by Thursday. True mastery means your child can explain the concept in their own words, apply it to new examples without your help, and retrieve it reliably even after a break.
I’ve learned the hard way that one perfect worksheet doesn’t equal mastery. My daughter once breezed through a fraction lesson, so I moved on. Two weeks later, she looked at me like I’d spoken Greek when fractions came up again. Now I check mastery by spacing out practice over time, if she can still do it on Friday and again the following Monday, we’re good to progress.
Don’t let curriculum pacing guides bully you into rushing. Your child’s understanding matters infinitely more than staying on schedule. If they need three extra days on double-digit subtraction, take them. If they master vowel sounds faster than expected, move ahead. This is the beauty of homeschooling, you can adjust the pace to match your child’s actual learning, not an arbitrary timeline designed for a classroom of thirty kids.
Watch for that moment when their face shifts from concentrated effort to confident ease. That’s your green light to move forward.
How to Know It’s Working (and What to Do Next)
You’ll know direct instruction is working when your child can explain the concept back to you in their own words and apply the skill without prompting. Watch for that “aha” moment, the shift from hesitant, step-by-step effort to confident execution. If your child can teach the skill to a younger sibling or complete similar problems independently without asking for help, you’re seeing real mastery, not just memorization.
Keep a simple progress log in a notebook or on your phone. Jot down the date, the skill, and how your child performed. Note whether they needed reminders, made errors, or sailed through independently. This documentation helps you spot patterns, maybe fractions click after three sessions, but multi-step word problems need five. That’s valuable information for pacing future lessons.
When you see consistent accuracy across multiple practice sessions, it’s time to transition to independent work. Don’t pull away all at once. Start by sitting nearby while your child works solo, then gradually increase the distance. Assign a few independent problems at the start of the next lesson to confirm retention.
Plan to spiral back to mastered skills regularly. Every few weeks, include a quick review problem in your warm-up routine. This prevents the “I knew this last month” frustration and reinforces long-term retention. Direct instruction builds a solid foundation, but that foundation needs occasional maintenance to stay strong.
If progress stalls or your child regresses, that’s not failure, it’s feedback. Slow down, revisit earlier steps, and check whether the skill before this one is truly solid. Sometimes what looks like a setback is just a sign you need to strengthen the foundation before building higher.
Common Questions About Direct Instruction Teaching Strategy
How long should a direct instruction lesson last?
Keep lessons short and focused, typically 15 to 30 minutes for younger children, up to 45 minutes for older students. The key is maintaining attention and energy, not dragging out a concept until everyone’s exhausted.
Can I use this with multiple children at once?
Yes, if they’re working on the same skill level. You’ll model for the group, then rotate through guided practice with each child individually while others work on related independent tasks. It takes planning, but it’s absolutely doable.
What if my child resists structured teaching?
Start with shorter sessions and subjects where they need the most support. Frame it as “I’m going to show you exactly how this works,” not “sit still for a lesson.” Some kids relax once they realize direct instruction actually makes hard things easier.
Is this too rigid for creative subjects like writing or art?
Not at all, direct instruction teaches the foundational skills that unlock creativity. You can explicitly teach paragraph structure, brush techniques, or how to develop a character, then give kids freedom to apply those tools in their own creative work.
How does this differ from discovery learning?
Discovery learning asks kids to figure out concepts through exploration, which works for some situations. Direct instruction explicitly teaches the skill first, reducing guesswork and cognitive overload, which is particularly effective for complex or foundational skills where struggling doesn’t lead to insight.
Do I need special training to use this strategy?
No formal training required. If you can break a task into steps and show your child how to do each one, you’re already using the core principles. The structured approach actually makes it easier to manage homeschooling because you have a clear teaching framework to follow.
These questions come up constantly in homeschool circles, and they all boil down to the same reassurance: direct instruction is flexible enough to fit your family. You’re not locked into hour-long lectures or a one-size-fits-all script. Adjust the lesson length to match your child’s attention span, teach siblings together when it makes sense, and recognize that even creative pursuits benefit from solid technique taught clearly. The structure supports learning, it doesn’t suffocate it.
You’ve just walked through a proven teaching strategy that research confirms works, and here’s the thing: you’re probably already doing much of this without even realizing it. Every time you show your child how to solve a problem before asking them to try it themselves, or when you break a tricky concept into smaller pieces they can actually handle, you’re using direct instruction. This approach simply gives structure and intention to what good teaching has always looked like.
The beauty of direct instruction for homeschooling is that it meets you where you are. You don’t need special training or expensive programs, just the willingness to teach clearly, check understanding along the way, and adjust your pace to match your child’s needs. It’s especially powerful for those subjects that feel intimidating, the ones where you worry you won’t explain things right. Now you have a framework that says: show them, practice together, check their understanding, support them as needed, and don’t rush to the next thing until they’re ready.
Your homeschool doesn’t have to look like anyone else’s. Some days you’ll follow these steps precisely; other days you’ll adapt on the fly because your child needs something different. That flexibility is your strength, not a weakness. You know your child better than any curriculum guide or teaching manual ever could.
Trust yourself. You have everything you need to teach with confidence and clarity, one intentional step at a time.