
Teaching your child the vertex formula means showing them how to find the highest or lowest point of a parabola using the equation h = -b/(2a), then calculating k by substituting h back into the original quadratic function. This method takes about 45 minutes to teach effectively and requires only basic algebra skills, making it completely manageable for homeschool parents even if math wasn’t your favorite subject in school.
I’ll be honest: when my oldest first hit this topic, I panicked. The words “vertex form” and “quadratic functions” sounded intimidating, and I worried I’d mess up her understanding. But here’s what I learned that changed everything: you don’t need to be a math expert to teach this well. You just need a clear plan, a few good practice worksheets, and the confidence to work through examples together.
The vertex formula bridges two important concepts your student already knows (solving for x and plugging values into equations) into one powerful tool for graphing parabolas. Once they grasp it, they can quickly identify turning points without completing the square or converting entire equations, which saves time on homework and builds real problem-solving confidence. The beauty of homeschooling is that you can slow down during the tricky parts, use real-world examples that matter to your family, and celebrate those lightbulb moments without the pressure of keeping pace with 30 other students.
This guide walks you through exactly what materials you’ll need, how to prepare, and the step-by-step teaching sequence that works, plus verification strategies to make sure the concept actually stuck.
What You’ll Need to Teach the Vertex Formula

You don’t need a fancy curriculum package to teach vertex formula effectively. When I first tackled this topic with my oldest, I spread three different math textbooks across the kitchen table before realizing I only needed a handful of straightforward resources, and most were free.
Here’s what actually matters for teaching this concept at home:
- Curriculum-aligned teaching resources that break down the vertex formula into digestible explanations and examples
- Practice worksheets with answer keys so you can check your student’s work without second-guessing yourself
- Graph paper or a graphing tool (even a simple online graphing calculator works)
- A quiet workspace where you can work through problems together without distractions
The good news is that excellent free materials exist specifically for high school algebra. Resource banks let you filter by high school level (Grades 9-12) and math subject, making it easy to find appropriate materials without wading through elementary topics. You can find printable worksheets designed for Grades 9-12 that include 15-20 questions with answer keys, perfect for guided practice, independent review, or formative assessment.
For example, free worksheets focusing on quadratic functions in vertex form help students practice converting equations, identifying the vertex, and graphing parabolas. Having answer keys changes everything because you can provide immediate feedback instead of waiting to check your own work first.
Before you start gathering materials, take a moment to organize math materials in one spot, a folder, binder, or dedicated shelf works. If you haven’t already, set up a homeschool room or workspace with good lighting and minimal distractions. Teaching math doesn’t require perfection, just preparation and a willingness to learn alongside your student.
Before You Begin: What Parents Need to Know
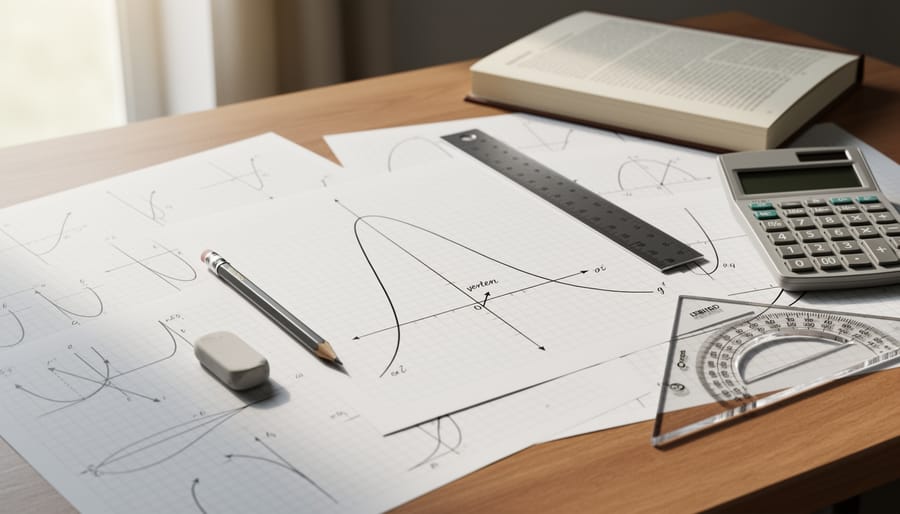
Take a deep breath before diving into teaching vertex formula, it’s okay to feel a little uncertain about math concepts you may not have used since high school. I’ve been there myself, staring at algebra worksheets the night before a lesson and wondering if I could pull this off. The truth is, you can absolutely teach this concept, but your success depends on honest preparation rather than winging it.
Don’t rush past the fundamentals your student needs first. If your child doesn’t have a solid grasp of quadratic functions in standard form (y = ax² + bx + c) and what parabolas look like on a graph, introducing vertex formula will feel like building a house on sand. Take the time to ensure they understand that a parabola has a turning point and that changing the coefficients affects its shape and position. These aren’t optional prerequisites, they’re the foundation.
Here’s something many parents don’t realize at first: there are two different forms of the same quadratic equation, and you need to understand both. Standard form (y = ax² + bx + c) is what most equations start in. Vertex form (y = a(x – h)² + k) directly shows you the vertex coordinates (h, k) without calculation. The vertex formula itself (x = -b/2a) is a tool for finding the vertex when you’re starting with standard form. Mixing these up is common, but clarifying the difference now prevents confusion later.
Remember that learning alongside your child isn’t a weakness, it models exactly the kind of problem-solving resilience we want our homeschoolers to develop. Some of my most memorable teaching moments happened when my student and I worked through a tricky problem together, both of us learning as we went.
Step-by-Step: Teaching the Vertex Formula
Step 1: Start with What They Already Know
Before introducing the vertex formula, you need to make sure your student remembers what a quadratic function looks like. Write y = ax² + bx + c on a piece of paper and ask them if they recognize it. This is standard form, and most algebra students have seen it before, even if they feel shaky on the details.
Next, sketch a simple parabola together. It doesn’t need to be perfect. Show them how it curves into a U-shape, either opening upward or downward. Then ask: What makes this different from a straight line? Let them think out loud. They might say it curves, or that it has a turn, or that it goes back on itself. All correct.
Now connect this shape to something they’ve seen in real life. A basketball arcing toward the hoop follows a parabola. So does water shooting from a fountain, or a soccer ball launched across a field. These aren’t abstract math problems, they’re the paths objects take when gravity pulls them down.
This quick review primes your student’s brain for the next step. You’re not starting from scratch. You’re building on what they already know, and that makes the vertex formula feel less intimidating when you introduce it.

Step 2: Introduce the Vertex and Why It Matters
Once your student grasps what a quadratic function looks like, it’s time to zoom in on the most important point: the vertex. Explain that the vertex as turning point is where the parabola changes direction, either reaching its highest point (if it opens downward) or its lowest point (if it opens upward). Draw a few parabolas on graph paper together and mark the vertex on each one so your student can see it visually.
Then make it real. I remember teaching this to my daughter and asking, “If you kicked a soccer ball, where does it reach its highest point before coming back down?” That clicked immediately. The vertex isn’t just a math term; it represents maximum height of a thrown object, minimum cost in a business problem, or the peak performance in countless scenarios. When students understand why the vertex matters in the real world, the formula stops feeling arbitrary and starts feeling useful. That shift in perspective makes all the difference in keeping them engaged.
Step 3: Present the Vertex Formula
Now it’s time to unveil the star of the show: the vertex formula itself. Take a deep breath, this is simpler than it looks at first glance.
The formula for finding the x-coordinate of the vertex is x = -b/(2a). That’s it. Just three letters and some basic arithmetic. Before your student’s eyes glaze over, break it down piece by piece. The letters a, b, and c come straight from the standard form equation you reviewed earlier: y = ax² + bx + c. The letter a is the coefficient (the number) in front of x², b is the coefficient in front of x, and c is the constant term standing alone at the end.
Here’s where I like to write out a sample equation on paper and label each part together. Let’s use y = 2x² + 8x + 3. Point to each number and identify it out loud: a equals 2, b equals 8, and c equals 3. Notice we don’t even need c for the vertex formula, it sits this one out.
Now plug those values into the formula. Walk through it step by step:
- Identify a and b from your equation (a = 2, b = 8)
- Substitute them into x = -b/(2a), giving you x = -8/(2 × 2)
- Calculate the result: x = -8/4, so x = -2
- Plug x = -2 back into the original equation to find the y-coordinate: y = 2(-2)² + 8(-2) + 3 = 8 – 16 + 3 = -5
The vertex of this parabola sits at (-2, -5). Work through this first example together, letting your student watch you think aloud as you substitute and solve. Then hand them the pencil for the next one. When I first taught this, my daughter was skeptical she could remember which letter went where, but after two examples, she had it cold. The formula sticks faster than you’d think.
Step 4: Practice with Guided Worksheets
Now it’s time to move from theory to practice. Grab a free printable worksheet designed for Grades 9-12, I recommend starting with one that has around 15-20 questions and comes with an answer key. The Wayground site offers several good options that work perfectly for this stage, including worksheets specifically on quadratic functions in vertex form.
Here’s how I handle practice sessions: work through the first two or three problems together at the kitchen table. Let your student watch you identify a, b, and c, then plug those values into the formula. Talk through your process out loud, even the mistakes. Once they’ve seen the pattern a few times, step back and let them tackle the next few independently while you’re nearby.
Start with worksheets that use simple coefficients before moving to harder problems with fractions or negative numbers. The beauty of worksheets with answer keys is that your student gets immediate feedback, which builds confidence faster than waiting until the end of the week to check their work.
These worksheets are flexible tools. Use them for guided practice when introducing the concept, as independent review once your student shows understanding, or as homework to reinforce the day’s lesson. Match the worksheet to where your student is, not where you think they should be.
Step 5: Connect Vertex Formula to Vertex Form
Now that your student can find the vertex using the formula, it’s time to introduce another powerful tool: vertex form. This is where the math starts to click together in a way that makes graphing parabolas much easier.
Vertex form looks like this: y = a(x – h)² + k. Here’s the beautiful part, (h, k) is the vertex, sitting right there in the equation. No calculation needed. When you see y = 2(x – 3)² + 5, you immediately know the vertex is at (3, 5). The vertex form definition becomes much clearer once your student works with real examples.
Show your student how the vertex formula and vertex form connect. When you use x = -b/(2a) to find the x-coordinate, you’re actually finding h. Then you substitute back to find k. Converting between standard form and vertex form helps your student visualize where the parabola sits on the graph before plotting a single point.
Practice worksheets that focus on converting quadratic equations to vertex form and identifying the vertex directly are perfect here. Look for worksheets designed for Grades 9-12 that include answer keys for immediate feedback. Start with equations that have simple coefficients, then gradually increase complexity as confidence builds.
How to Know Your Student Has Mastered It
You’ll know your student has truly mastered the vertex formula when they can work through problems independently without constantly checking their notes. Watch for these specific signs: they correctly identify a, b, and c from any quadratic equation in standard form, apply x = -b/(2a) without mixing up the negative sign or the 2a denominator, calculate both the x-coordinate and y-coordinate of the vertex, and accurately graph parabolas with the vertex in the right spot. A student who’s got it can also convert equations between standard form and vertex form and explain why the vertex matters for that particular parabola.
Use answer keys from practice worksheets to give immediate feedback during formative assessment rather than waiting until your student has completed an entire set. When mistakes happen, resist the urge to simply show the correct answer. Instead, ask where they got stuck: “Can you show me how you identified b in this equation?” or “What happened when you divided by 2a?” If errors cluster around negative numbers or order of operations, pause and revisit those foundational skills before continuing. However, if your student grasps the concept but makes occasional careless mistakes, that’s normal, keep practicing with varied problems. Real mastery takes time, and working through 15-20 practice problems over several days builds the confidence and accuracy you’re looking for.
Common Questions Homeschool Parents Ask
Teaching vertex formula at home brings up practical questions, and you’re not alone in wondering about the best approach. These are the concerns I hear most often from homeschool parents tackling this algebra milestone.
What grade level should learn vertex formula?
Most students encounter vertex formula in Grade 9 or 10 algebra, typically after they’ve mastered basic quadratic functions and graphing. If your student feels comfortable identifying parabolas and working with standard form equations, they’re ready for this next step.
Should I teach standard form or vertex form first?
Start with standard form since that’s what most students recognize from earlier algebra work. Once they’ve practiced finding the vertex using the formula with standard form, introduce vertex form as a different way to see the same information.
Where can I find answer keys to check my student’s work?
Many free printable worksheets designed for Grades 9-12 come with answer keys, making it easy to provide immediate feedback during practice sessions without second-guessing yourself.
How long should this concept take to teach?
Plan for about a week of focused practice, though some students grasp it in three days while others need two weeks. Let your student’s confidence and accuracy guide the pace rather than rushing to finish.
If your student struggles with negative numbers in the formula, especially the negative sign in x = -b/(2a), slow down and work through the substitution step by step. Write out each stage clearly, showing how -(-6) becomes positive 6, for example. This isn’t a weakness, it’s a normal sticking point that clears up with repeated practice.
After your student masters vertex formula, they’ll move into more complex transformations and applications of quadratic functions. Eventually, these algebra foundations will prepare them for calculus terms in later high school years, so you’re building skills that matter long-term. Take pride in each small victory along the way.
You’ve got this. Teaching the vertex formula at home might have felt intimidating when you started, but you’ve now got the roadmap: curriculum-aligned resources that match high school standards, practice worksheets with answer keys for instant feedback, and a step-by-step approach that builds confidence for both you and your student. Work through those problems together, celebrate when your child gets it right, and learn from mistakes without pressure. This is a genuine milestone in your homeschool math journey.
I’ve watched hundreds of homeschool parents tackle concepts they never thought they could teach, and the transformation happens when you realize you don’t need to be the expert from day one. You just need to show up, work through the confusion alongside your child, and trust the process. There’s something powerful about struggling through a tough algebraic concept together and coming out the other side stronger. You’re building more than math skills here, you’re building resilience, problem-solving ability, and the confidence that comes from facing challenges head-on. Trust yourself. You’re doing better than you think.